
Water supply systems utilize High-Density Polyethylene (HDPE) pipes for their extraordinary anti-corrosion features, flexibility, and durability. This manual provides a detailed examination of the installation procedures and best practices for HDPE pipes. It covers everything from site preparation to trenching methods to correct alignment and joining techniques while following industry standards. The result will be reliable and efficient water distribution networks that withstand environmental pressure or time.
What are HDPE pipes, and why Are they used for water supply?
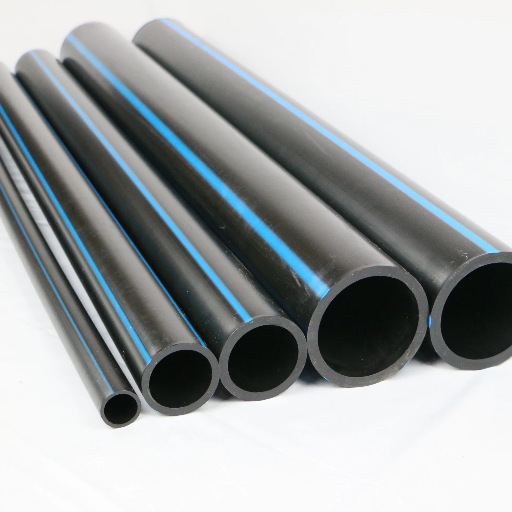
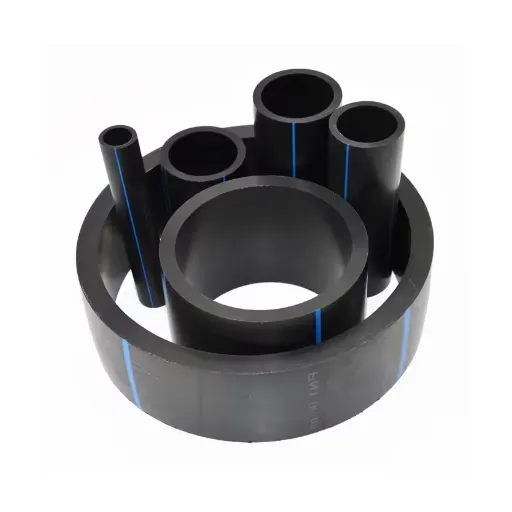
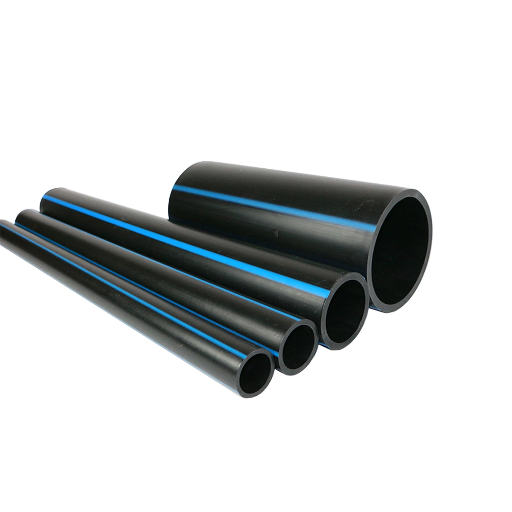
Understanding HDPE Pipe Characteristics
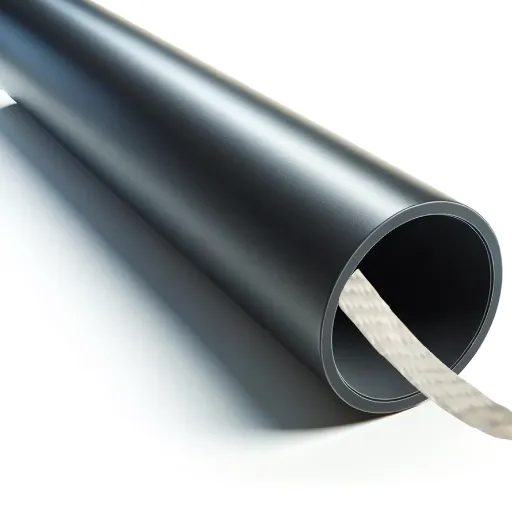
High-density polyethylene pipes have high strength and density levels, which make them very tough against impacts and abrasions. These tubes are also known for enduring temperatures greater than 120°C without melting; this excellent heat stability allows their use throughout different climates. Furthermore, they are light in weight so that people can handle them easily during installation, thereby reducing labor costs, especially when dealing with large-scale projects. Another thing is that these materials possess chemical resistivity and hence can be used even with aggressive fluids where other pipe systems fail to deliver extended service life because of smoothness internally, which reduces friction losses, thus improving efficiency in water delivery systems – such properties cannot go unnoticed when selecting appropriate components for modern-day plumbing infrastructure.
Advantages of HDPE Pipes
HDPE pipes have several benefits which make them perfect for water supply systems. These are mentioned below:
- Sturdiness: Thanks to their resistance to chemicals, they can last for at least 50 years because they do not corrode easily. This means that frequent replacements and maintenance will be less needed, thus ensuring long-term cost savings.
- Flexibility: These tubes’ high flexibility enables them to withstand ground shifts or temperature variations without cracking or breaking apart; this feature is most useful in seismic zones or regions with unstable soils.
- Low Friction Coefficient: The value for the friction coefficient on the smooth inner surface is approximately 0.008, which helps reduce energy consumption by decreasing the pressure drop through pipe walls during pumping and, therefore, improving flow rate efficiency.
- Leakage Resistance: Electrofusion, as well as butt fusion, are among the methods used for joining HDPE pipes; these produce seamless joints that are equally strong with the rest of the pipe hence minimizing chances of leakage while enhancing overall system reliability.
- Lightweight Building Material: Being lightweight makes it easier to handle, transport, and install, thus cutting down on installation time and costs involved in laying heavy materials like steel or PVC. The average density of HDPE is about 0.94 g/cm³, meaning it is much lighter than traditional materials.
- Eco-friendly Choice: They can be recycled, so they don’t harm the environment when disposed of. Additionally, manufacturing them requires less carbon emissions compared to other types of plastics used in making pipes meant for similar purposes. Additionally, because they last longer, this saves resources over their lifetime, too.
These advantages demonstrate why modern water supply infrastructure should adopt HDPE pipes, which are reliable, efficient, and cost-effective.
Comparing HDPE to Other Pipe Materials
When you compare HDPE pipes with traditional materials like PVC and steel, it is clear that every material has its own advantages and disadvantages. From what I have found during my evaluation, flexibility and durability in areas with ground movements or extreme weather changes are where HDPE performs best. It should be noted that unlike PVC, which is rigid and can crack when stressed, HDPE allows for movement without compromising the structure’s strength.
Steel, on the other hand, provides high strength but corrodes easily, thus significantly reducing its life span and requiring continuous maintenance throughout this period. HDPE’s Chemical resistance eliminates these worries, making it sustainable for diverse applications, too. Another thing brought out by this analysis is that the lower friction coefficient of HDPE enhances flow efficiency vis-a-vis energy-sapping characteristics associated with pumping PVCs over long distances, especially where there are bends along such routes.
In summary, all these points favor using modern piping systems made from Higher Density Polyethylene (HDPE) over any other alternative pipe material because they offer better long-term performance and cost-effectiveness.
How to Prepare for HDPE Pipe Installation?
Measurement of the Length of Pipe that is needed
Precise measurement of the length of pipe required is significant when preparing for HDPE pipe installation to ensure economical utilization of resources and minimize waste. I usually start by evaluating where the pipeline will be laid out from this particular area. Between these points, I normally resort to a measuring wheel or tape measure to establish their distances so as to take into account any bends along its course. It should be noted that allowances for fittings and connections must be included in specifying the desired length. After taking several readings and crosschecking them, I calculate an exact total length requirement enabling accurate ordering from suppliers, hence adequate material supply with minimal wastage.
How Deep Should I Dig This Trench?
When deciding on how deep the trench should be for HDPE pipe installation, I consider two things: what type is it used for? And what does the regulation say? The depth of the trench should contain within both the diameter of the pipe and cover sufficient enough to protect it from forces encountered externally, such as vehicular movement and freeze-thaw cycles common in some regions. For most installations, my minimum burial depth would comply with local codes ranging from 24”-36”, but depending on environmental conditions and ground movements, it can vary sometimes. Additionally, I ensure that any debris is cleared off from the bottom end of the trench, thus providing a stable base on which pipe can rest. If we’re working in places where there’s unstable ground or increased risk of soil erosion, then we might dig deeper while keeping water away through good drainage systems around our conduit. Following these instructions, it became easy for me to develop a long-lasting and dependable HDPE piping system.
Which Tools and Materials Do I Need?
Before installing HDPE pipes, certain tools and materials must be collected together; otherwise, everything goes haywire; every item should be put in place properly, though not haphazardly. In addition, I should have a pipe cutter to enable me to create specific pipe lengths and fittings, such as elbows and tees, to facilitate easy installation. I ensure that safety equipment is available on site, including hard hats, gloves, and eye goggles by occupational health regulations. All materials must be checked to determine whether they meet the required specifications; therefore, project standards are used to confirm their quality. By bringing together these items before starting my work, efficiency and a danger-free environment will always be promoted throughout the whole course of the installation exercise.
What Are the Common Methods of HDPE Pipe Installation?
Direct Burial Method
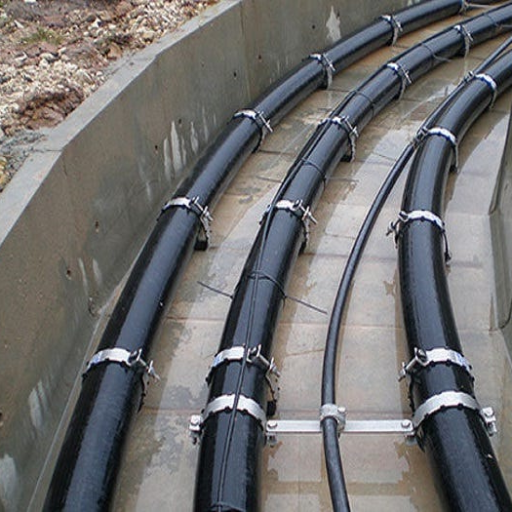
When it comes to installing an HDPE pipe using the Direct Burial Method, I first find out the right depth of burying the pipe by considering a specific application and environmental factors. In general, I normally follow the guideline that requires a minimum cover of 30 inches in non-traffic areas and 48 inches in traffic areas to mitigate risks associated with surface loads, which may result in damage. The trench walls should not have slopes more than 1:1 as this minimizes soil collapse.
After digging the trench, my concern is how well the HDPE pipe will be placed within it while ensuring there is proper alignment and a drainage slope of about 1-2%. During exposure to sunlight or high temperatures, thermal expansion can occur. Hence, I need to consider temperature levels, especially when sourcing for expansion fittings or even allowing enough joint allowance. When joining different lengths of pipes, I consider certain relevant ASTM standards such as F2620 and apply fusion techniques that form secure bond capable of sustaining required pressures which are typically between 50 psi to150 psi depending on different applications.
For completion purposes, clean soil is used to backfill the trench without including rocks or trash that may weaken it. Backfill is generally compacted in lifts not exceeding twelve inches for best support around the pipe. After filling up and compacting the trench area, a pressure test must be done before covering any surface to ascertain whether equipment integrity is alright. Such conscious procedures help ensure the HDPE pipe system becomes strong enough, reliable, and properly fits within its operational environment.
Horizontal Directional Drilling (HDD)
When undertaking Horizontal Directional Drilling (HDD), I employ a systematic method to achieve effective subterranean installations. To begin with, I perform a comprehensive site assessment that includes soil condition evaluations using methods such as borehole sampling and geotechnical testing. This stage is very important since it helps me determine the best drilling fluid properties and appropriate drilling parameters.
A typical drill rig has a power capacity of between 30,000 and 100,000 pounds thrust, depending on the diameter and length of the bore. For drilling, I choose a pilot bit size that takes into account the necessary hole enlargement required before the installation of the product pipe. Standard sizes range from 4 to 12 inches, depending on application use.
In drilling, variables such as weight on bit (WOB), rotation speed, and pullback tension are closely monitored within specified limits so that they do not cause bore failure or loss of integrity. Drilling fluids, which are mixtures of water and bentonite clay, have multiple functions, including cooling bits down the hole while stabilizing it and transporting cuttings out to the surface. I normally maintain an approximate flow rate of 5-10 gallons per minute to effectively manage these processes.
Upon completing the pilot hole, I carry out reaming to increase its diameter to the desired size, which may call for more than one pass using increasingly larger reamers. Once fully prepared, the product pipe is inserted using controlled pull back approach ensuring tensions/loads don’t exceed tensile strength & bend radius specifications of pipes.This technique minimizes surface disruption hence highly advantageous in congested areas or regions with environmental concerns.
To conclude my entire HDD process records everything including penetration rates, hole dimensions and fluid volumes; this data enables quality assurance as well as future reference purposes. Each HDD project conforms to stringent industry norms through this information thereby enabling it to satisfactorily support the operational requirements of the infrastructure.
Pipe Bursting Technique
In implementing the technique of pipe bursting I start by assessing the existing underground infrastructure to determine the appropriate bursting head and replacement pipe dimensions. The bursting head, typically designed to exceed the original pipe diameter by 20% to 30%, facilitates the effective fracturing of the existing pipe while creating a pathway for the new pipe. In choosing bursting head materials, consideration is given to the material compositions of the existing pipes, which are usually either PVC, ductile iron, or clay.
Preparing the site for operation involves ensuring that all equipment, such as hydraulic burst machines with force ratings ranging from 30-100 tons, are operational and calibrated. The first step involves inserting a small pilot bore through the old pipe, giving a reference point for bursting head placement. After successfully making a pilot hole, I engage my hydraulic system which pressurizes slowly as it pushes towards its end until it reaches this point. I continually monitor applied pressure in order to maintain thrust around 70% of the machine’s maximum capacity so as not to stress surrounding soil structures too much.
All through this process of bursting, I keep a record of force exerted from thrusts, which come between 15 to 30 tons per foot section (distance), and monitor soil displacement. This information is important in reducing surface disruption and preserving adjacent utilities’ integrity. Once this has been accomplished, the initial tube is broken up into pieces, and a new one is pulled out before checking if it is well placed and fits within the required diameter and flow capacity limits. Accordingly, completion of the Pipe Bursting Technique encompasses comprehensive documentation where relevant data, i.e., breakout pressures, soil conditions, and project timeline, among others, are put down, thus leaving behind a technical legacy that can be used in the future for reference purposes regarding quality assurance.
How do you install HDPE pipes in a trench?
Trenching and Excavation
When installing HDPE pipes, I always start by carefully establishing the trench size according to pipe size and depth of installation. Normally, the trench should be dug wide enough to accommodate ample space around the pipe both for installation and backfilling–approximately 12 inches wider than the outside diameter (OD) of the pipe on each side is perfect. I make sure that the depth of the trench fits with appropriate bedding material, such as sand or fine gravel, which acts as a firm base.
I dig trenches while conducting soil tests and checking for subterranean cables. A good drainage system is important to address groundwater issues that may arise during excavation. The finished trench has smooth vertical walls and leveled bases without sharp stones or debris that might harm HDPE pipes. This methodical approach contributes to not only a sound set-up but also good practice in this industry for longevity purposes.
Properly Bedding The Trench
The next crucial step after excavation is properly bedding the trench to ensure they are adequately supported throughout its length with HDPE pipes. For example, a layer made from clean sand or fine gravel could serve as bedding material for this purpose..This thickness ought to be approximately between four to six inches because it needs to provide a solid surface on which the pipe will rest, conforming to its shape; I am therefore careful not to compact it so much as that would have resulted in the deformation of pipes due to high amounts of density.
Once you have laid out your initial beddings, put your HDPE pipe into position within your trench, taking care so that it is flat and there are no strains. When carrying out backfilling operations, especially for long runs or lengths, piping should be periodically supported at different intervals to keep it in place without causing problems during the filling process. Similarly, I ensure that my bedding materials match up with my conduits dimensionwise hence allowing additional fill to be put in at later stages of construction. By using this kind of complete bedding, the structural integrity is enhanced while following leading industry resources that have guidelines for durability and the long life of the installation.
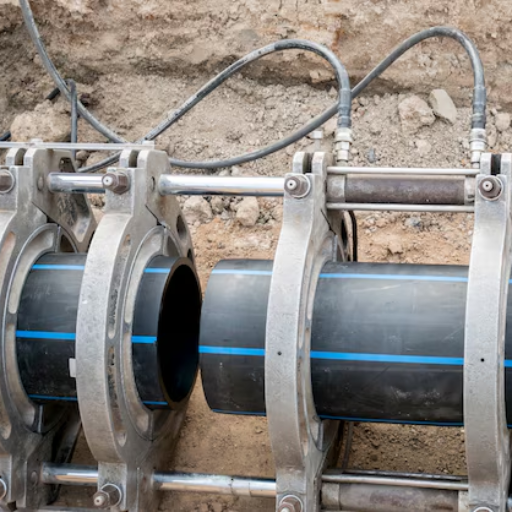
Laying and Fusing HDPE Pipes
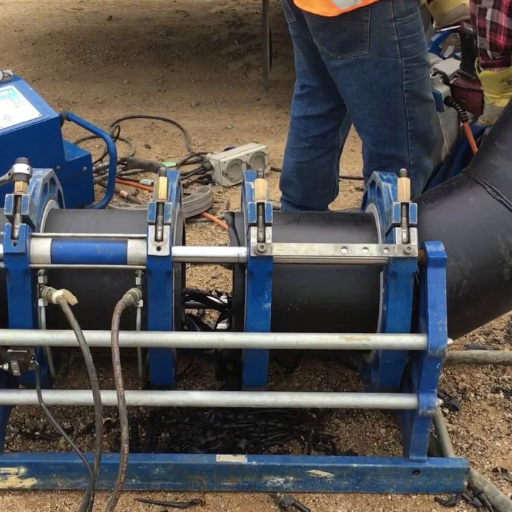
To lay and join HDPE pipes, I have a way of doing things that is orderly in its execution and gives credence to accuracy. The first step is to make sure that the pipes are clean and free from dirt or debris which may compromise weld or joint integrity. Meanwhile, for joining, I use the electrofusion method most of the time, which involves an electrofusion fitting with built-in heating elements. Then I align the pipes appropriately in terms of directionality while ensuring the fitting has been placed securely.
Afterwards, I start by introducing myself into the equation here, we find out if this is true by comparing two things: the welding cycle in an electro-fusion unit (which melts the surfaces of both pipe and fitter creating a strong molecular bond when it cools down). The connection must be given enough time to cool before any stresses or pressures are imposed on it in order to provide a sturdy link. Furthermore, I always do pressure testing after installation to check if joints are intact. This comprehensive approach towards laying and fusing HDPE pipelines conforms with industry standards while significantly reducing future leakages or failures.
Backfilling the Trench
I take care not to put anything else beneath it, but once these conditions have been met, they can be backfilled using proper techniques, ensuring stability and minimizing chances of settling ground. Once you have securely tested your HDPE pipes, begin by placing select backfill materials over them—typically granular soil/sand—making sure there are no large clumps or debris present in these materials.This first layer is important since it cushions against external damage.
Afterwards, I go ahead to compact this layer progressively so as to form a firm foundation while taking into account the manufacturer’s specifications concerning compaction density.The native soil comes next, where after initial compaction takes place, backfilling will be carried out continuously using controlled compaction methods to ensure that the surrounding ground is not disturbed and no air spaces are created. At every point of this exercise, I always insist on doing it according to the best practices recommended by leading authorities in the field; hence, I am sure that the final product will be both long-lasting and resistant to external pressures for a considerable period.
How to Ensure the Longevity of HDPE Water Pipes?
Regular Maintenance Practices
To guarantee lasting HDPE water pipe pipes, I adopt a comprehensive maintenance strategy based on the most up-to-date sources in the field. Hence, regular inspection is very important whereby I visually check exposed sections of the pipes at least twice in a year for any signs of wear, corrosion or joint integrity problems. Also, systematic pressure tests are carried out within allowable limits to ensure the system functions normally. Pressure test should also not exceed 150% of maximum working pressure as per technical standards from reliable references to prevent failure.
Additionally, backfill material is checked for settling or shifting, which may indicate pipe displacement. In case this happens, immediate action is taken to address these issues. More importantly, heavy machinery and excessive loads should be kept off such areas, as the recommended load capacity over HDPE pipes does not exceed 2000 pounds per linear foot to prevent stress damage.
These practices guarantee that future complications can be avoided by conforming to industry standards and preserving the performance and reliability of an HDPE water piping system.
Monitoring for telltale signs of wear and tear
This is why, when monitoring HDPE water pipes for signs of wear and tear, I use a systematic method based on the accumulated wisdom of leading industry sources. Each review concentrates on primary symptoms, including surface abrasion, cracking, or deformation, that are vital in determining the condition of a pipeline system.
- Surface Inspection: I look for any visible signs of surface abrasions or UV degradation that can weaken the material. In line with Plastics Pipe Institute (PPI) protocols, it is noticed that any appearance of huge surface attrition may involve detailed analysis regarding its predicted service life span.
- Pipe Joint Integrity: I inspect joint areas closely to ensure they are not leaking or separating, as this can hinder the systems’ proper functioning. According to comprehensive research by the American Society of Civil Engineers (ASCE), joints should be surveyed every six months to ensure their operational integrity.
- Pressure Fluctuations: This implies my continued monitoring of pressure readings, since variations outside the normal operating range could mean hidden issues. ASTM F714 standards stipulate that the typical operating pressure for HDPE pipes ought to remain within 50% – 100% of their rated pressures.
- Backfill Settlement: I also assess whether there is any problem with the backfill material around the pipe walls. As per the National Association of Sewer Service Companies (NASSCO), good backfilling must support load without structural damage to the pipe itself.
Attending to these guidelines fully and thoroughly would enable me to identify in time and fix possible cases where wear and structural integrity questions might come up. Thus, this would guarantee a long life and dependability for the HDPE water piping system.
Prompt Action to Potential Problems
As a pipeline integrity professional, I am concerned with timely identification and resolution of potential issues that would reduce risk and maintain system reliability. Advanced monitoring tools like real-time pressure sensors and acoustic leak detection allow me to take proactive action for such anomalies before they become serious defects. The latest best practices contained in American Water Works Association (AWWA) industry materials suggest that a maintenance schedule should be used to incorporate these monitoring technologies while maintaining regularity accompanied by data-based inspection processes only. Additionally, participating in predictive maintenance analyses aids me in preparing for future challenges based on past data trends, hence driving strategic response strategies. This way, the efficiency and operational safety of the pipe system can be effectively guaranteed.
Reference sources
-
United Poly Systems-HDPE Pipe Installation Methods
-
Lined Pipe Systems-Simple And Easy Steps To Install HDPE Pipeline
-
Pars Ethylene Kish-Guide for the installation of single-wall HDPE pipes
Frequently Asked Questions (FAQs)
Q: What is HDPE, and why are people using it for water supply pipelines?
A: HDPE denotes High-Density Polyethylene, a plastic known for its strength and flexibility. HDPE pipes are used to transport drinking water because they do not corrode, last a long time, and can be fixed easily.
Q: What are the basic steps for trench installation of HDPE pipes?
A: The first step involves digging the trench and then ensuring that the bed has been smoothed out and cleared of any sharp objects that may damage the pipeline. Then, the HDPE pipe is laid down and covered with soil while aligning properly throughout.
Q: How do you determine the pipe diameter needed for a water supply project?
A: The size of the pipe required should be based on factors like the amount or volume of water being conveyed, the pressure requirement, and local regulations, among others. Thus, one needs professional advice so as not to choose the wrong size.
Q: Can you install HDPE pipes using trenchless methods?
A: Yes, it is possible to install these types without trenches. They require minimal excavation work and are, hence, less disruptive than traditional methods, making them more versatile in areas where digging would be impossible.
Q: How is the pipe cut during the installation process?
A: A hacksaw or specialized cutter can be used to cut through this material, but care must be taken to ensure that cuts are made straight; otherwise, joints would not hold when placed along trenches.
Q: What types of valves are compatible with HDPE pipes?
A: Gate valves, ball valves, and butterfly valves are some examples among many other different kinds that can effectively work with polyethylene pipes, depending on system design requirements and the diameter size needed for specific applications within any given water distribution network.
Q: What precautions should be taken during installation to successfully complete an HDEP pipeline?
A: Trench beds must not contain sharp objects, clamps/supports must be properly used, and local building codes should be followed. Alignment must be right throughout the whole pipeline length, with correct connections made at each joint point, even as pipes are handled gently while fixing them into their respective trenches so they do not break easily.
Q: How long does it take to install HDPE pipes?
A: The duration taken depends on factors such as project magnitude, status of trenching, and method used for laying, which can differ from one place to another. However, ease in installation has been associated with this material compared to others.
Q: Can I use chlorine with HDPE pipes for water supply?
A: Yes, these tubes can withstand chlorine exposure and other chemicals commonly employed during treatment processes, thus making them appropriate means of conveying potable drinking water without causing harm or corrosion on pipe walls over time.
Q: Where can I get information or assistance on installing HDPE pipes?
A: If you need further guidance about fitting high-density polyethylene pipelines, please contact us today. Our specialists will offer the necessary support and share best practices for successfully completing various projects involving such systems.